Banana-berry Muffins

What do you do with the entire pint of berries that your picky toddler won’t eat? Make muffins!

img_5971

The Simple Healthy Life : Banana-berry Muffins

I get really hopeful at the grocery store when I see that beautiful, shiny pint of blueberries on sale. I think, “she’ll try these because they’re blue…and round…and look like tiny balls.” Then, she crushes my dreams when we get home and she snarls her nose. Yep, it happens time after time. You feel me mama, I know you do. Instead of letting her completely win this battle, I decided to try to turn it into something that she would actually eat. So, I threw them in with some sure fire ingredients – sugar and flour, of course – and it was a win! No longer will she waste my precious $3 pint of blueberries…or blackberries. Yes, you can use this with any berry – so far, I’ve tried this same recipe with blueberries and blackberries, but I’m waiting for her to snarl her nose at raspberries so I can give them a try. *adding raspberries to grocery list…*

If you don’t have a mini muffin pan, I highly suggest you purchase one. The muffins are the perfect size for those little toddler hands. Plus, you won’t feel bad when you eat 3 of them.

Banana-berry Muffins

3 ripe bananas
3⁄4 cup sugar
1 egg
1⁄3 cup melted coconut oil or butter
1 cup berries (any kind)
1 teaspoon baking soda
1 teaspoon baking powder
1⁄2 teaspoon salt
1 1⁄2 cups flour (I use 1/2 whole wheat and 1/2 white)

Preheat oven to 375 degrees. Mash bananas in a large mixing bowl. Add sugar, egg, butter, and berries. Combine dry ingredients and gently stir into banana mixture. Pour into well-greased muffin tins or use muffin cups.
Bake for 20 minutes.

4 Ways to Survive Grocery Shopping with a Toddler

Grocery shopping is my favorite pastime. When I get to go on a solo grocery trip you’d think I was going on a wild girls weekend – I get excited. Those trips are few and far between. Typically, you’ll find me in the bakery begging the girl behind the counter for another free cookie for my whining, but adorable, toddler that keeps saying “mo mo” because she wants MORE and she wants in NOW. More about that later. On these trips, I’ve learned a few lessons in my 17 months as a grocery shopping mother and I think these lessons need to be shared.

grocery

1) Park Smart! It all starts in the parking lot. Forget the entrance, park close to the shopping carts. You can grab a cart and put your tiny human in the cart lessening your load immediately – everyone knows the diaper bag is already causing you early on-set osteoarthritis in your shoulders anyway. If you’re baby is still in a carrier, you can just sit the carrier in the cart. I remember the days of carrying that carrier until my arm was turning purple, so parking next to the carts was necessary. When you’re done, drive the cart right to your car and unload your groceries, load your child up and return the cart without having to abandon it.

2) Stop at the Bakery. Most grocery stores offer treats for kids and this always starts the trip on a good note. While I don’t advocate for massive amounts of sugar for kids, this one cookie will provide enough sanity for you to make this exception. If you don’t agree, you’re next best stop would be produce for a banana. Pack some extra snacks for when the cookie is gone though. I’ve recently been informed that Dum Dum suckers work great – leave the wrapper on and that will give you an extra 2 minutes of peace!

3) Don’t Shop on a Sunday. Monday and Tuesday’s are much less crowded than Saturday or Sunday meaning that you can zip through the store faster than having to dodge others to get to the best looking bunch of bananas. Oh, and less people to stop and talk to about “is this your only one” or “I can remember when mine was that little.”

4) Go prepared. This is my tip for all grocery shopping, with or without a child. Always have a list and try to stick to it. The average grocery store has over 42, 000 items, so having a list will help you get through quicker and more efficiently. If you need help preparing a list, shoot me an email and I’ll be glad to help you plan!

I hope this gives you some ideas on how to make your grocery shopping easier., mama. Now, shop on and don’t steel your kid’s bakery cookie!

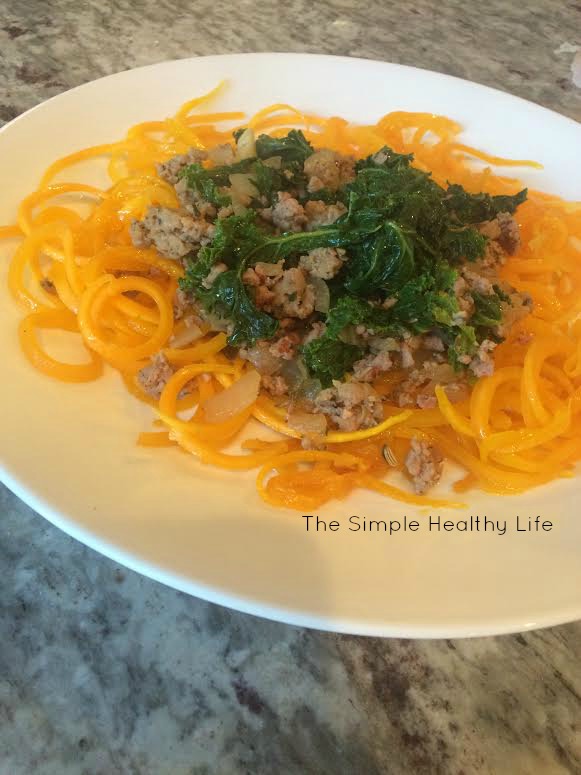
Butternut Squash Noodles with Chicken Sausage & Kale

Every time I make something outside of the box, my husband gives me a snarl. Then, he tries it and 9 out of 10 times goes back for seconds and thirds. This was one of those. We literally ate the entire pot and my 1-year-old ate the chicken sausage like it was Apple Flavored Puffs (her favorite).

I wanted to venture away from zucchini with my Vegetti and when I saw butternut squash at our local produce stand, I knew I had to experiment! Thus, this new little dish was created and will be duplicated!

unnamed

Butternut Squash Noodles with Chicken Sausage & Kale

1 Tbsp coconut oil
1lb chicken sausage (could use pork or turkey)
Salt and pepper to taste
1 chopped sweet onion
8 oz. of baby kale
2 garlic cloves, minced
½ cup chicken broth
1 tsp of apple cider vinegar
Dash of cayenne pepper
1 tsp ground fennel
2 dashes of nutmeg
2 tsp ground sage

Remove the sausage casings if using links – I just squish it out of the ends. Heat a large wide and deep pan over medium heat. Add the oil, then brown and crumble the sausage, adding salt and pepper to taste.

Add the chopped onion and cook until the onions soften and become translucent.

Add the kale, and stir until it is wilted. It will look like it won’t fit in the pan, but it will shrink!

Add the garlic and cook for 1 minute.

Add the chicken stock, apple cider vinegar, and spices. Stir and cook uncovered for 2-3 minutes to reduce a bit of the liquid.

Add the “noodles” to the pan and toss until will mixed.Enjoy!

Sweet Potato Enchilada Casserole

Oh my ya’ll, I just love this one! Whenever I break out my Veggetti, I get weird looks from my hubby, but then he always gobbles up whatever I put on the table. This is just another one of those recipes. While I do use my Veggetti to make sweet potato noodles, you could just dice the sweet potatoes if you don’t have a spiralizer. By using sweet potatoes in place of the normal tortillas or pasta, the amount of calories, carbohydrates, and unhealthy fats that are typically found in casseroles is significantly reduced. I would say that gives you every right to have 2 servings! 🙂IMG_3023 (2)

Sweet Potato Enchilada Casserole

1 lb  chicken breasts, cooked and shredded*
2 cups red enchilada sauce
1 can (15 oz) black beans, drained and rinsed
1 can (15 oz) corn, drained
salt and pepper, to taste
2 medium sweet potatoes, spiralized
6 oz Mexican cheese blend, shredded
Optional garnishes: avocado, sour cream, green onions, salsa

Preheat the oven to 400 degrees.
Add the shredded chicken, enchilada sauce, black beans, and corn to a large mixing bowl and stir to combine. Season with salt and pepper, to taste. Set aside.

Grease a 9×13 casserole dish with coconut oil. Add the sweet potatoes. Then, pour the shredded chicken mixture over the sweet potatoes and top with shredded cheese. Cover tightly with aluminum foil (this is important to keep cheese from burning like mine in the picture!!).

Bake for 50 minutes or until the cheese is bubbly and the sweet potatoes are cooked through. Allow the casserole to rest a few minutes before serving.

*I just boil my chicken, then shred with a fork.

IMG_3022 (2)

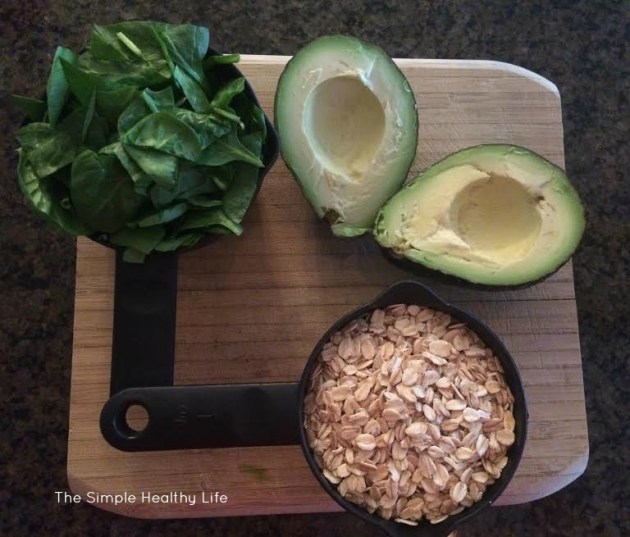
Baby Eats: Avocado + Spinach + Oats

Just throwing it out there before we even get started that this is one of the stinkiest blends that I’ve made! Now that we’ve gotten that out of the way, I can tell you that my little one loves this blend despite it’s rank smell. The good fat of the avocado combined with the fiber rich oats and nutrient dense spinach make this puree a near perfect meal for your little one. It is packed with fiber, good fat, calcium, iron, Vitamins A and B, and protein – quite the baby food win if you ask me.8f23ee1c-4b6d-4a87-91f1-7fa4b532b56a

Avocado + Spinach + Oats

1 medium to large avocado
1 cup chopped spinach
1 cup oats
2 cups water

Cook oats and water in saucepan over medium high heat for 10 minutes. Place oats, spinach, and avocado in blender and puree until desired consistency is reached.

This will store in an airtight container in the fridge for 2 days. I typically pour mine into ice cube trays, freeze, and store cubes in freezer bags.


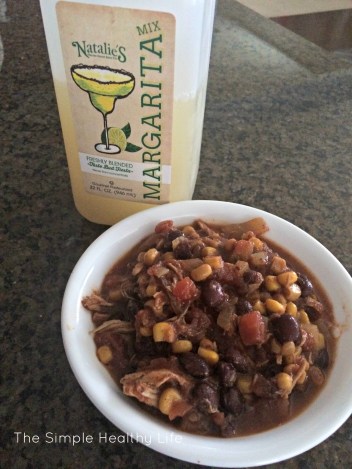
Slow Cooker Margarita Chicken Soup

When I heard that it was National Margarita Day, I knew I had to share this recipe that I made last week. I was given this jug of Natalie’s Orchid Island Juice Margarita Mix at one of my husband’s bike races and it’s been staring at me every time I open the fridge. I’m not a huge drinker, so I had to figure out another way to use this mix. I will say, I did enjoy a margarita made with the leftover mix tonight (in celebration of National Margarita Day of course) and it was delicious! Ole! It only has 3 ingredients – limes, water, and natural pure cane sugar – which is great compared to a lot of other mixes out there that contain high fructose corn syrup and artificial colors.

This soup is easy, goes right in your slow cooker, and is done at the end of your day! It’s a great twist to the classic chicken tortilla soup and has just the right tang of the lime juice. Enjoy!

marg soup

Slow Cooker Margarita Chicken Soup

1 pound boneless, skinless chicken breast (I used frozen)
1 can diced tomatoes with chilles
1.5 cup margarita mix
1 (15 oz) can of black beans, rinsed and drained
1 (14 oz) can of diced tomatoes
1 (14 oz) can of corn
1 packet of taco seasoning*
Optional toppings: avocado (highly recommended!), shredded cheese, green onions, tortilla chips

Layer the first 7 ingredients in your slow cooker.  Cover and cook on low 6 to 8 hours or on high 3 to 4 hours.

When ready to eat, shred the chicken with two forks inside the slow cooker or remove, shred on a plate, then return shredded chicken to slow cooker.  That’s it!

*Make your own taco seasoning by combining 1 tablespoon chili powder and 1/4 teaspoon each of garlic powder, onion powder, red pepper flakes, oregano, paprika, cumin, salt and pepper.

Basic Baby Food Puree

Making homemade baby food may sound like a daunting task and just one more to add to your list as a mom. I’m certainly not here to do any mom-shaming if you just don’t have time to do it, but I do want to tell you how easy it is to make if you’ve been thinking about trying!

Babies triple their birth weight in the first year and it seems like they are constantly eating whether it be milk/formula or baby food or a combo of both. I remember when my little one was closing in on 4 months, I was so excited to start giving her cereal. I thought, “you’ve got to be tired of milk kiddo!” We started with a basic organic rice cereal and moved on to avocados, then sweet potatoes, beets and the rest is history – she now has the pallet of a 40-year-old hippy!

Creating homemade baby food is a faster, healthier, less expensive alternative to jarred or pouched baby food. While it may seem convenient to just buy the jars or pouches from the store, I can make weeks worth of wholesome baby food in less than an hour. With one sweet potato, I can typically make 24 ounces which equates to roughly 12 meals for my girl.

Sweet potatoes are one of the most popular first foods for babies and often are the first food they try after rice cereal. Today, I’m going to share with you a basic puree for sweet potatoes. As a side note, I accidentally picked up white sweet potatoes at Earth Fare, so that’s why they aren’t a beautiful orange.

Tools Needed:
-blender, immersion blender, or food processor
-steamer, steam basket, or medium sauce pot
-vegetable peeler
-vegetable wash and brush
-cutting board

Step 1: Prepare Sweet Potato
step1

Spray sweet potato with veggie wash or simply wash thoroughly. Peel potato.

Step 2: Slice Sweet Potato
Step2

Slice sweet potato into 1/2 – 1 inch slices.

Step 3: Steam Sweet Potato
Step3

Using a steamer* or steam basket, steam sweet potato until tender. If you do not have a steamer, simply use a sauce pot to boil the sweet potato until tender.

Step 4: Puree Sweet Potato
Using a blender or food processor, add sweet potato and 1/2 cup water and blend. Add water to find desired consistency.

Step 5: Freeze Puree
Step4

Pour the puree into ice cube trays and freeze for 1 hour or until hardened.

Step 6: Store Puree
Step5

Once frozen, pop the cubes out and store in a freezer bag. Take cubes out as needed, thaw, heat (if desired), and feed to your little one.

I hope you find this to be simple – if you have any questions please feel free to ask!

*I use the Baby Bullet Steamer.

4 Kitchen Gadgets to Help You Get Healthy

The gimmicky gadgets that are As Seen on TV often come with a promise that seems to good to be true. I don’t think I’ve ever bought one of those items or even been in one of the As Seen on TV stores, but I have been intrigued. For Christmas this year, I asked for one of these items and my mind has been BLOWN since I received it. The gimmicky gadget known as The Veggetti inspired me to tell you all about it and a few other things that have made my health journey a little easier. So, I won’t keep you waiting any longer, here are my favorite kitchen gadgets.

1) The Veggetti Spiral Vegetable Slicer

During my pregnancy, all I craved was spaghetti which ultimately helped me gain over 50lbs. Had I purchased this little gem during those 9 months, I may have been able to save a few of those pounds….maybe? It has allowed this pasta lover to enjoy pasta dishes again. There are several versions of spiralizers, but this one is affordable and easy to store. It turns vegetables into noodles, so you can enjoy pasta dishes without the heavy, refined carbs. I’ve experimented with zucchini and sweet potatoes, but have my eye on making a cucumber noodle pasta soon!

2) George Foreman Grill

I remember when this “lean, mean, fat-reducing machine” came on the market in the 90s – it was all the rage! Now, a couple of decades later, the rage has died down, but the grill is still as awesome as it once was. It’s not only convenient by allowing the ability to quickly grill indoors, but provides the benefit of reducing the fat out of certain meats. The product is designed to heat the top and bottom surfaces of the food, eliminating the need to flip it. Each heating surface is grooved to reduce contact area, and covered in a non-stick coating. The lower heating surface is slanted to allow melted fat and other fluids to drain through the grooves into a separate drip tray, which shows the amount removed from the food. It’s now offered in individual sizes and larger sizes for multiple servings.

3) Steam Basket

Broccoli is one of the most common side dishes in our home. Shamefully, I must confess that it typically comes straight out of the freezer and into the microwave with a little lemon pepper shaken on top. I can only imagine how many precious nutrients are stripped away in the name of convenience. Recently, I pulled out my steam basket that I have had for years instead of my usual microwave technique and it was SO much better. The steam basket fits in almost any size sauce pan and preserves the nutrients and flavor of vegetables.

4) Misto

This was one of the many items that we randomly added to our wedding registry because it looked cool. After the first use, I was hooked. As a lifelong Pam user, I had come to terms with the fact that it is filled with unnecessary chemicals and that I needed to find another option. The Misto (and coconut oil) was that option. It is a reusable oil spray and mister bottle that gives you the convenience and health benefits of an aerosol sprayer in a more economical and environmentally-friendly form. I’ve only used it with olive oil, but it can be filled with any kind of oils, vinegar, and even salad dressings. The Misto produces an even, pure mist, so you use less oil when preparing foods. You’ll eat healthier and save money – a win all around!

Slow Cooker Thai Chicken Soup

I’m so excited to share this recipe! It’s gloomy and rainy here, so it seems like the perfect time to share. We love Thai food in all forms in our household – I would even go as far to say that it would be “my last meal” request if I ever had to make that decision. Let’s hope I don’t! Ha. When I found this recipe that combined two of my favorite things – the slow cooker and Thai food – I knew I had to give it a try and put my twist on it.

Some of the ingredients may sound foreign to you, but you can actually find them all in any grocery stores international/oriental section. So, get on that!

Slow Cooker Thai Chicken Soupthai chicken soup

2 tablespoons red curry paste
2 (12 ounce) cans of coconut milk
2 cups chicken stock
2 tablespoons fish sauce
2 tablespoons peanut butter
1½ pounds chicken breasts
1 red bell pepper, thinly sliced
1 onion, thinly sliced
1 tablespoon ground ginger
1 cup frozen peas
1 tablespoon lime juice
2 cups cooked rice or quinoa

Mix the curry paste, coconut milk, chicken stock, fish sauce, and peanut butter in slow cooker. Place the chicken breast, red bell pepper, onion and ginger in the slow cooker, cover and cook on high for 4 hours. After 4 hours, remove chicken breast and shred. Return to slow cooker.

Add in the peas and cook for ½ hour longer. Stir in lime juice. Serve over rice or quinoa – you can also just add the rice or quinoa to the soup and mix it in the slow cooker.


Menu, Meal Plan, Whatever You Want to Call It!

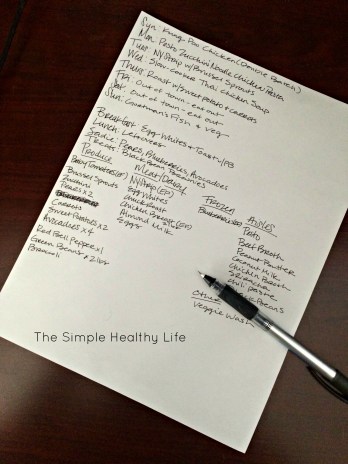
Hi friends and Happy New Year! It’s been a very long while. I’ve been very busy being a mom, wife, full-time employee, and everything in between. Cooking has always been my way of feeling creative and in some ways I feel like it is my love language. Even though things are crazy busy and hectic, cooking helps me feel “normal” – if that even exists in motherhood.

Before I can cook, I have to go *dun dun dun* GROCERY SHOPPING! Those dreaded two words can be so daunting to people, but I’ve actually come to enjoy it. It takes some time each week to come up with a meal plan and shopping list, but it is worth it to have my kitchen stocked with healthy food for the week. I typically do my shopping on Sunday afternoons so that we can start the week off right.

IMG_2869

My method is pretty easy – I write down each meal I want to cook for dinner each night, add the ingredients to the list, and it’s done. My list is categorized by grocery store department to help me navigate quicker. We usually have the same thing for breakfast and typically eat leftovers for lunch, so those things are just added at the end. However, I know some of you like to mix it up, so I included this one on the menu template. To get a better picture of how I map this out download my Weekly Menu Template and Weekly Shopping List Template. You can certainly do this on scratch paper, but sometimes it’s nice to have a pretty layout! As you can see above, I write mine down on whatever I can find and it’s not always pretty.