Slow Cooker Beef & Broccoli

I’m not sure what inspired me to cook beef & broccoli, but I’m sure glad I tried it! After throwing this in the slow cooker, our house started smelling like this dish immediately and I must say that it was hard not to continuously peak into the slow cooker in hopes that it was ready for a little taste. It was worth the wait!

We served this over quinoa, but you could serve it over brown rice or just eat it plain.

Slow Cooker Beef & Broccoli beef and broccoli

Ingredients:
1 lb. stew beef
1 cup beef broth
1/2 cup soy sauce, tamari, or liquid aminos
1/3 cup dark brown sugar
1 tbsp sesame oil
3 garlic cloves, minced
2 tbsp cornstarch or tapioca starch
1 bag frozen broccoli florets (about 3-4 cups)

In a mixing bowl, whisk together the beef broth, soy sauce, dark brown sugar, sesame oil, and garlic.

Lay the beef in the slow cooker and pour the sauce over, tossing the strips to coat.

Turn the slow cooker on low and cook for about 6 hours. Be sure to check it at the 4 hour mark, as you don’t want the beef to get overdone.

When it is just about done, take 4 Tbsp of the sauce and whisk it in a small bowl with the cornstarch.  Slowly stir this into the slow cooker.  Add the broccoli and cook for about 30 more minutes.

Serve over quinoa or rice and enjoy!

Spaghetti Squash Lasagna

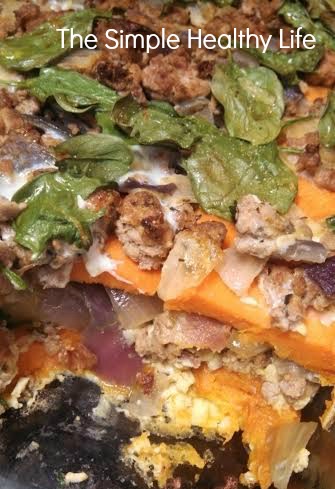
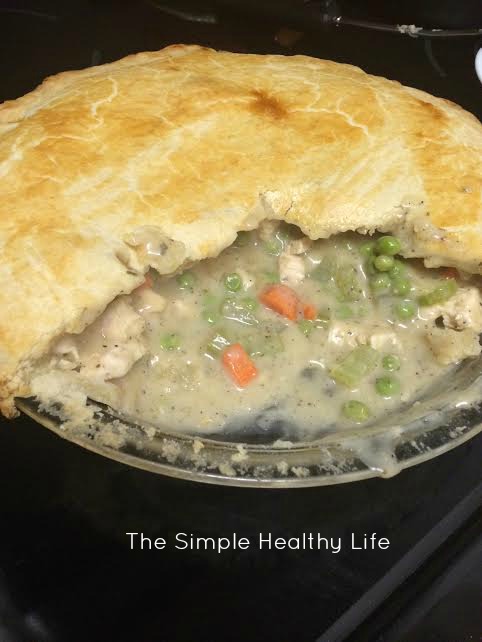
In an attempt to lose the baby weight, I’m trying so very hard to stop eating the way I did when I was pregnant – pasta, bread, ice cream…basically anything I wanted. This was the demise that my doctor used as the reason Baby D was such a big baby weighing in a 9.2 lbs. Giving up the deliciousness that is pasta and Italian food makes me sad, but there are always equally delicious alternatives! Spaghetti squash is one of my favorite alternatives to pasta. I’ve yet to try using zucchini noodles, but that is coming soon. This week I took to creating a “lasagna” out of spaghetti squash. It was fantastic and will probably be added to the rotation in our household. Hank and I ate the whole pan – yikes! It’s just some veggies, meat and cheese, no worries! Ha!

If you aren’t sure how to cook a spaghetti squash, it’s easy! Follow these easy steps:
1) Preheat oven to 350 degrees.
2) Place spaghetti squash in a microwave safe dish, pierce it a couple of times with a knife, then microwave for 5-8 minutes to soften.
3) Cut squash lengthwise and place face down in an oven safe dish with 1/4 cup water. Bake for 30 minutes.

I didn’t get a great picture of the inside of it, but here’s a shot of the dish before we devoured it.

Spaghetti Squash LasagnaIMG_1760[1]

1lb Italian turkey sausage, casings removed and crumbled
1 cup of cottage cheese
1 jar spaghetti sauce
1 cooked spaghetti squash (about 2lbs)
1 cup of mozzarella cheese
Italian seasoning, to taste
Garlic powder, to taste

1. Preheat oven to 375 and b

2.Brown the turkey sausage until no longer pink

3. While turkey is cooking, discard seeds from the squash and remove your “spaghetti” using a fork (similar to how you’d shred chicken with a fork)

4. Spoon a little bit of sauce on the bottom of the casserole dish then layer squash + sausage + a little more sauce + 1/3 cup mozzarella + cottage cheese + remaining sauce + remaining mozzarella. Sprinkle with a little Italian seasoning and garlic powder if you wish. And, as always, feel free to add more sauce and cheese if you like things a little more saucy and cheesy!

5. Bake until cheese is melted and bubbly – probably about 15 mins.

Sweet Garlic Baked Chicken Wings

I made these for the Super Bowl and I’m just now getting around to post em – par the course for me! These are such a great alternative to the usual chicken wings you can order at the bar. These are baked, not fried, and have a deliciously sweet homemade sauce. So, next time you’re having friends over to watch the big game, whip up some of these bad boys and you’ll be sure to impress.

Sweet Garlic Baked Chicken Wings

3 lbs chicken wings (antibiotic & hormone free)
1/3 cup honey
Juice from 1/4 lemon
¼ cup water
2 tablespoon tamari (soy sauce)
2 tablespoon apple cider vinegar
2 teaspoon garlic powder
¾ teaspoon ground ginger

In a sauce pan, heat oney, lemon juice, water, soy sauce, vinegar, garlic and ginger in a small saucepan over medium-high heat. Turn heat down to low once it starts to simmer and let simmer for 5 minutes. Remove from heat and let cool.
2. Pour marinade over chicken wings (I like to do this in a large ziplock bag but you could do this in a bowl or baking dish too). Let marinade in the refrigerator for at least 2 hours (the more the better).
3. Barbecue chicken wings until cooked, turning once (something like 20 minutes total, depending on how hot your barbecue is). Alternatively, place in a greased baking dish (or line with foil) and bake at 400F for 1 hour, turning once. Enjoy!

Chicken Pot Pie

The arctic chill is moving in here in Charlotte and chicken pot pie seemed to be the perfect comfort food to warm us up! I have never made scratch out chicken pot pie, so this was an adventure to be had in my tiny kitchen. I have to preface this recipe article by saying that you could totally make this a vegetarian (not vegan) dish by using potatoes in place of chicken…and I believe it would be just as delicious!

A while back I had picked up a can of Dancing Deer Baking Company‘s Pie Crust Mix – it was on the discount rack at work, so I had to snag it and all along I had the intention of using it to make chicken pot pie.When I turned the can of pie crust mix over to read the directions, I saw that I needed 2 sticks of butter….YOWZA! I decided to use 1 stick and 2 heaping tablespoons of coconut oil. It turned out beautifully delicious! You can definitely use a pre-made pie crust and it would cut the prep time in half! So, let’s begin.

chicken pot pie1

Chicken Pot Pie

1 lb boneless, skinless chicken breasts – cubedchicken pot pie1 cup diced carrots
1 cup frozen green peas
1/2 cup sliced celery
1/3 cup butter
1/3 cup chopped onion
1/3 cup all-purpose flour
1 tsp salt
1 tsp black pepper
1/4 tsp celery seed
1/2 tsp garlic powder
1 3/4 cup chicken broth
2/3 cup milk
2 (9 inch unbaked pie crusts)

Start by slicing and dicing your veggies. Then, cube your chicken.

Preheat oven to 425 degrees F.

In a saucepan, combine chicken, carrots, peas, and celery. Add enough water to cover the chicken and veggies and boil for 15 minutes.

Remove from heat, drain and set aside. In the same saucepan over medium heat, cook onions in butter until soft. Stir in flour, salt, pepper, garlic powder and celery seed. SLOWLY stir in chicken broth and milk. Simmer over medium-low heat until thick. Remove from heat and set aside.

Place the chicken mixture in bottom pie crust. Pour hot liquid mixture over. Cover with top crust and seal edges with your fingers. Brush with an egg wash for a flaky crush.

Bake for 30 to 35 minutes, or until pastry is golden brown and filling is bubbly. Cool for 10 minutes before serving.

Chia Pudding

I love love love Chia Pudding! It is perfect to mix with your favorite fruit, nuts or just eat alone. Sometimes I even throw in a little cocoa powder to get my chocolate fix! It keeps nicely in a sealed container in the fridge for up to a week, so I typically enjoy it as my sweet treat at night all week.

Chia seeds are high in quality protein – significantly higher than other plant foods. Protein is the most weight loss friendly macronutrient and can drastically reduce cravings.

Chia seeds can seem expensive. However, you can buy them in the bulk section at your local health food store like Earth Fare ($13.99/lb) – 1 lb of chia seeds goes a long way! There are many places to buy chia seeds online, but I really encourage you to support your local health food store – vote with your dollars to keep them in business!

chiapudding

Chia Pudding

1 (13.5oz) can full-fat coconut milk
1/4 cup chia seeds
1 tbsp. honey (or more to taste)
1 tsp. vanilla

Mix all ingredients together. Keep in a sealed container in the fridge overnight.
*This will seem very liquidy, but it will thicken overnight.

Vegetarian Chili

If I were to make this chili for my husband he would say, “where’s the meat?” It is rare that I get to enjoy a meal made solely of vegetables until he isn’t around for dinner. Now, don’t get me wrong, I’d much rather have him here for dinner, but I do love when I get to make vegetarian dishes. I love it even more when I get to whip out my beautiful blue dutch oven!

This chili is so flavorful and filling! I will no doubt make it for my man piece…but I will add some ground beef just for him.

chili 4

Vegetarian Chili
(Serves 2 – make double for leftovers!)
2 tbsp coconut oil
1 small butternut squash, peeled and cut into cubes
2 medium carrots, peeled and cut into 1/4-inch pieces
1/2 large onion, chopped
1 tbsp chili powder
1 tsp minced garlic
1 (14oz)can diced tomatoes
1 jalapeno, seeded and minced
1/2 cup vegetable broth
1/2 tbsp honey
1 tsp sea salt
1 can black beans, rinsed and drained
1/2 cup fresh cilantro

In a dutch oven or a large pot, heat 1 tbsp oil over medium-high heat. Add squash and cook, stirring occasionally, until golden. Transfer squash to a bowl and set-aside.

chili 1

In the same dutch oven, heat 1 tbsp oil. Add carrots and onion and cook, stirring occasionally, until tender. Stir in chili powder and garlic.

chili 3

Add tomatoes, jalapenos, broth, honey, and salt; heat to boiling over medium-high heat. Add beans and squash, stir and heat to boiling. Reduce heat to low. Cover and let simmer for about 30 minutes until squash is tender.

chili 5

Remove from heat, stir in cilantro, and enjoy! I topped mine with goat cheese and cayenne pepper – such amazing flavor!

Oven Fajitas

I’ve now fixed these 2 weeks in a row. I can’t get enough! These fajitas are maybe the best I’ve ever fixed and by far the easiest. You can stick them in the oven and do something else while they’re cooking instead of standing over a skillet.

I can’t take all the credit for this recipe because I got the original recipe from Budget Bytes. She has some really great recipes that help make cooking easy for those of us that are trying to stick to a budget. They’re easy to tweak to make a little bit healthier or adaptable to whatever diet you’re trying to stick to.

fajitas2

Oven Fajitas

Seasoning Mix
1 Tbsp chili powder
½ Tbsp paprika
½ tsp onion powder
¼ tsp garlic powder
¼ tsp cumin
⅛ tsp cayenne pepper
½ tsp salt

Fajitas
1 large onion, cut into thin strips
2 bell peppers (any color), cut into thin strips
1 lb boneless, skinless chicken breast, cut into thin strips
1 tbsp butter, melted
Honey, to drizzle
1 lime
8 (6-inch) corn tortillas
Ideal toppings: salsa, cilantro, sour cream

Instructions

Preheat the oven to 400 degrees. In a small bowl, mix all of the ingredients for the fajita seasoning  and set aside.

Place the onions and peppers in a large 9×13 inch casserole dish. Add the chicken to the veggies. Sprinkle the seasoning over the meat and vegetables. Drizzle the melted butter over everything and then use your hands to toss the ingredients until all is well coated in butter and seasoning. Drizzle honey over the mixture (about 2 tbsp).

Bake for 30-35 minutes, stirring once half way through. Squeeze the lime over the mix once it comes out of the oven. Scoop a small amount of fajita mix into the center of each tortilla**.

fajitas3

**I’ve discovered that heating the tortillas on the stovetop is the BEST way. I just heat up a pan (do not grease it), cook tortilla for 10 seconds then flip and cook the other side for 10 seconds. DONE!

Easy Teriyaki Chicken

One of the many reasons that I love any type of Asian food is because you can throw so many different veggies in to make it a complete meal! Typically, I make a lot of Thai food, but last night I thought I would switch it up a bit. This was so easy to prep before heading out to the gym and then it was ready to throw in the wok to cook when we got in. Beyond chicken, you could use flank steak, shrimp, salmon, or just veggies! It is a very versatile dish.

tchicken
1-2 lb chicken breast, cut in cubes
2 cups fresh broccoli
2 cups snow peas
2 garlic cloves or 1 tsp minced garlic
4 carrots, sliced
1 tbsp coconut oil

Teriyaki Sauce

2 Tbsp ginger, chopped
1/3 cup aminos or soy sauce
1/3 cup cold water
2 teaspoons tapioca starch or cornstarch
1/3 cup honey

DIRECTIONS:

In a small bowl mix the Teriyaki sauce ingredients. In a small sauce pan, over medium to low heat, heat the sauce until thicken stirring occasionally. About 5 minutes. Then remove from heat until adding to chicken mixture.

In a large wok or skillet, over medium to high heat, add coconut oil. Add the chicken and carrots and cook stirring occasionally until almost tender. Add the garlic and cook further for another minute.

Reduce heat to medium and add broccoli and snap peas and stir for 2 minutes.

Add the Teriyaki sauce to the chicken mixture and stir until it thickens. Serve over quinoa, brown rice, or rice noodles.

Bruschetta Chicken Skillet

As I’ve mentioned before, I love anything that can all be eaten out of one bowl. There are several reasons for this love of one bowl meals – 1) I don’t have to think about what sides to cook and 2) it makes sitting on the couch watching Netflix easier when you can just hold one bowl! In this case, I made somewhat of a pasta dish, but replaced the pasta with zucchini noodles to make sure we were getting some veggies. Make sure to make your noodles before you make the main dish so they’re ready when the good stuff is done.
 
bruschettachicken
 
Bruschetta Chicken Skillet
1 (14.5oz) can Diced Tomatoes, drained
3/4 cup shredded Italian cheese (romano, asiago, or mozzarella)
1/4 cup fresh basil, chopped or 2 tsp dried
1 lb boneless skinless chicken breasts, cubed
1 (8oz) can Tomato Sauce
1 tsp minced garlic
1 tsp oregano
1 tsp onion powder
Optional: 2 cups gluten-free crackers or croutons crushed
Olive oil

In a medium bowl, stir together drained tomatoes and sauce, cheese, oregano, onion powder, garlic and basil; set aside.
In a large skillet, add about 1 tbsp of olive oil, then add chicken.
Over medium-high heat, cover chicken with tomato mixture and bring to boil. Reduce heat to medium-low, cover and cook 15 minutes or until chicken is cooked through. Top with crushed crackers and a garnish of cheese before serving over zucchini noodles (see recipe below).

To make Zucchini Noodles: Slice zucchini into thin strips then saute on low-medium heat in about 1-2 tbsp olive oil. Season with garlic powder, salt, and pepper while you’re sauteing.

Paleo “Man” Casserole

First, I should say, don’t let the steps turn you away – it is easy and totally worth it!

I call this “Man” Casserole because it’s beastly! It’s so filling and full of manly things like bacon, lean ground turkey, and sweet potatoes. Most casseroles are full of…well, crap…but not this one – it is as clean as a whistle! You will need a large, deep skillet/pan to brown the meat and a deep casserole dish to bake it all. It was originally adapted from Paleo Pot Paleo Hungry Man Sweet Potato Casserole, but I put my own spin on it to make it adaptable to us.

cass


Paleo “Man” Casserole

Ingredients:
2 lbs lean ground meat of choice (I used ground turkey)
1/2 lb bacon
8 eggs
3 large sweet potatoes
1 white onion, diced into large pieces
1 red onion, diced into large pieces
1 – 2 tbsp each: paprika, garlic powder, oregano, sage
handful of spinach
salt & pepper to taste
Coconut Oil (or butter/ghee)

Directions:
Preheat oven to 400.
Peel your sweet potatoes and microwave them for 4 minutes to soften them. Then slice the sweet potatoes into thin slices.
Dice your bacon into small pieces then brown in a skillet. Drain and set aside for later.
Add beef, onions, and spices to the skillet and brown the meat. Drain and return to pan. (Be sure your meat is done and the onions are tender)
While beef is browning, whisk the eggs in a large bowl (I added some onion salt to my eggs). Add spinach to egg mixture and whisk again.
Assemble to casserole as follows:
1) Grease casserole dish with coconut oil.
2) Line the bottom of the dish with sweet potatoes, then spoon a layer of beef, then sprinkle bacon pieces. Repeat. Keep doing this until you’re done with the sweet potatoes, beef, and bacon.
3) Pour the eggs on top. They will fall into place while cooking.

Now, back for 35-40 minutes. Let cool for 10 minutes. Enjoy! (We added some hot sauce and ketchup, of course!)